Wednesday, September 30, 2009

Amateur Radio

This post is just to take a snapshot of where my Amateur Radio hobby has progress to.

I've been licensed for about 2 years now, with the call sign VE3IAC. My radio station is here in Ottawa and although I'm in the suburbs I have space to put up a 30ft tall 40m to 6m multi-band vertical and a 120ft 80m to 6m offset center fed dipole.

The rigs here in the shack span from a 2008 all solid state rig to a 1970's hybrid rig w/ a tube based final.

The Yaesu 2000D is a very competent 200W base rig, it is very fun to play with and has more settings than you can shake a stick at. This rig usually stays at home, although I have taken it out to ARRL Field Day this past summer. At Field Day I operate a digital station running PSK31 which is a digital mode similar to RTTY. I have found a great bunch of guys here in the Ottawa region called the 3730 group. We enjoy a nightly net at 9:00PM Eastern and checkins come from VE1 VE2, VE3 land, and a hand full of US stations.

The ICOM-7000 is a 100W portable rig that I use when I operate portable which I try to do as often as I can. I have a portable antenna called a Buddipole which is a simple component antenna system that uses a combination of whips, and loading coils. Vertical and dipole configurations can be made for 40m to 6m.

On the older side of things, is a pleasent Kenwood TS850S. This rig belonged to my Dad Alcide, VE1JNA. Dad was pleased with his radio and when he became a silent key I made sure I was able to keep the rig back on the air for him by getting my ticket and continuing the hobby. Thanks Dad.

All of these rigs are 100% solid state and each have their strong points.

On the older side, I recently picked up a 1970's Yaesu FT-101E at a local flea market. Sold as-is with some work needed, I was pleased to have it on the air in a few days. I remain convinced it needs an alignment. This is a semi solid state 100W rig with a tube driver and a pair of 6JS6C's finals. This is very different rig to run and some how seems more like a radio than the more recent rigs. It needs more attention to operate and it simply seems right to see the tube glow and hear them crinkle under the load of transmitting.


Above is an image of the contacts I have made over the past few years. These are from either the house, the cottage, or portable operation from the Ottawa Valley Region.

The sunspots are very very low over the past few years and my most remarkable DX contacts were two to New Zealand on 40m near midnight local time.

Thanks for stopping by.

Vern, I hope you were able to find this and enjoyed seeing where this hobby has taken me.

Adrien

Sunday, September 13, 2009

A New Old FT-101E

Well there simply must be at least 1 boat anchor in every shack, and being somewhat new to the hobby I had the pleasure of needing to `go out and get one`.

The Yaesu FT101 series radios were met with quick adoption by the Ham community when these radios were introduced in the early 70`s. Since I have no experience with a tube based radio I quickly set my determination on getting one of these rigs. I was interested in seeing what I could learn both in terms of operating a tube rig.

I was able to pick up at a local flea market, a FT-101E which was in need of a little work.


First Impressions

Simply stated `Very solid`, this little rig weighs in as heavy as the FT2000D, largely due to the built in transformer which supports providing the 230W of input power to the finals as well as the remainder of the radio. It is safe to say that these radios are hand crafted, which is simply great for the operator who wants to get his `hands on`, and potentially also shocked, but lets hope that does not happen.


First Steps

The seller provided me with a set of crystals 3 6JS6C spare finals, with 2 already installed in the Radio and 1 12BY7A Driver. I installed the crystals and the 1 driver tube, plugged it in to AC source and hoped for the best. I was also supplied with a complete hard copy of the service manual which is very complete and has all the information I will likely need.

From here on in, I have structured this post into three sections. Things what work, Things that do not and repairs I have done.

Things that work

The rig powered up, fine, and most things looked O.K. on first glance. Lots of audio, and some signals could be had on LSB. Heaters did light up as expected. All lamps worked as expected, and the cooling fan for the finals ran nicely.

  • 80M/40M/20M/15M/11M/10M Rx
  • Preselector
  • WWV 10MHz Rx
  • 100 and 25kHz markers
  • Bias Adjust; Bias current responds smoothly with adjustment of bias control variable resistor VR1. Bias was set to 60mA as required.


Things that still do not appear to work as expected

The vernier slips as the main tuning dial is rotated.
Meter function switch contacts are poor.


Items worked on

  • Fixed: Low sensitivity on bands that work. Don't ask me why but I tested PL4, the lamp that is in series with the signal path in from the antenna connector. It was not open, but resistance was north of 100 ohms. The replacement part form the local hardware store also PN 1815 was about 5 ohms. Sensitivity is much better with the replacement part.
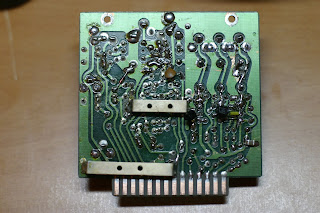
  • Fixed: USB is "as dead as a doornail". LSB worked fine but USB was not operational. I tracked the lack of any signal reception to the Q3 on the modulator unit. There was a repair attempted and this was part of the hint. I noticed that the transistor was not the part called for in the schematic. The design part 2SC372Y was replaced by a 2SC383. Q3, Q5 abd Q6 are all the same device, is responsible for the generation of USB, LSB and CW/AM carrier inputs. I moved the Q6 part too the position of the Q3 and this fixed the USB mode problem. I replaced Q6 with a silicon part 2N3904. Now all modes work, LSB. USB, Tune, CW and AM.
  • Alignment: Bias. Set Bias to 60mA as required. There is some play in the meter function switch which makes getting a reading a bit awkward.
  • Alignment: ALC level. ALC level was low, at about 0.3, Adjusted Level control to set ALC level to 0..5 as required in the alignment procedure.